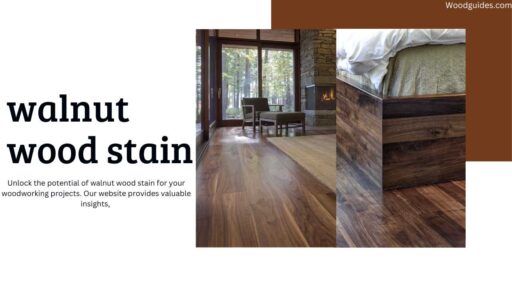
Uncover the secrets to selecting the perfect cherry wood stain with our complete guide. Enhance the beauty of your cherry wood with confidence.
Cherry wood is famous for being one of its kind. With a deep reddish-brown color and an even grain, it is a great choice for use in furniture, flooring or cabinets. It has a warm hue and polish that can go with any decor.
However, when it comes to bringing out this charm, choosing the right stain is very essential. All these are contained in this comprehensive guide that will help you choose the best cherry wood Cherry Wood Stain for you.
The Prunus genus found in North America provides cherry wood. As they age, they develop an exclusive patina, which darkens their color, making them more attractive than before.
The grain structure of the wood is fine and delicate, with straight lines alternating with some wavy parts, giving it a sophisticated look. This makes carpenters love the material as it also has a very smooth texture, which can easily be polished and worked on.
Why You Need To Use Stain On Cherry Wood
Cherry wood may lose its natural appearance faster if it’s unprotected. It’s also easily worn down. This shows the importance of choosing specific stains to make it look better.
These should bring out deep tones in timber. They should also match their grains, which have resistance to water, scratches, and ultraviolet rays. On top of that, good stains can enhance whatever you desire from cherry woods, whether modern or traditional taste.
Factors To Consider When Choosing A Cherry Wood Stain
Credit: www.pexels.com
There are several considerations worth noting when selecting a stain for cherry wood. First, note your material’s base color before staining it. No color changes as cherries start to pale and get darker. Use clear or natural stains to keep the tree’s color. But, if you want a richer color, use red or brown stains.
Do not overlook the desired level of transparency. Some stains hide an all-natural appearance, while others leave it visible. Reflect on your personal stance for viewability and how it aids in accomplishing the entire look and feel you desire.
Such factors include room lighting where cherry wood is to be placed. In general, darker stains absorb light, whereas lighter ones reflect it; this thereby influences the atmosphere of a space.
Different Kinds Of Cherry Wood Stain That Are Presently Available
Cherry wood stain come in different types. Being aware of them will enable you to decide wisely. Oil-based stains are long-lasting because they penetrate deeply into the grain of the timber. But waterborne ones dry faster, so they smell less and are easy to clean. Gels are thicker than other liquids. They are good for vertical surfaces because they do not drip or run.
Also there are also other specialty stains such as wiping stains which can be easily applied and blended. However, they could be better suited for you if you are new to the staining process or want something that is not quite as demanding.
Also, there are stains. They highlight wood grain. This makes it look more pronounced and textured. Through trying different types of dyes, he/she will come across the one that exactly suits his/her cherry wood project.
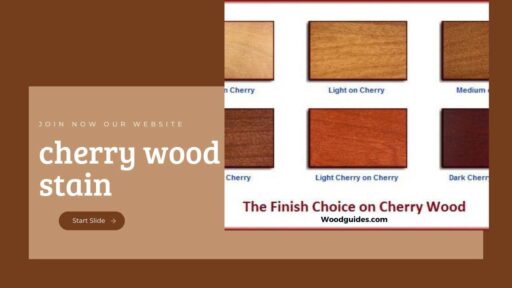
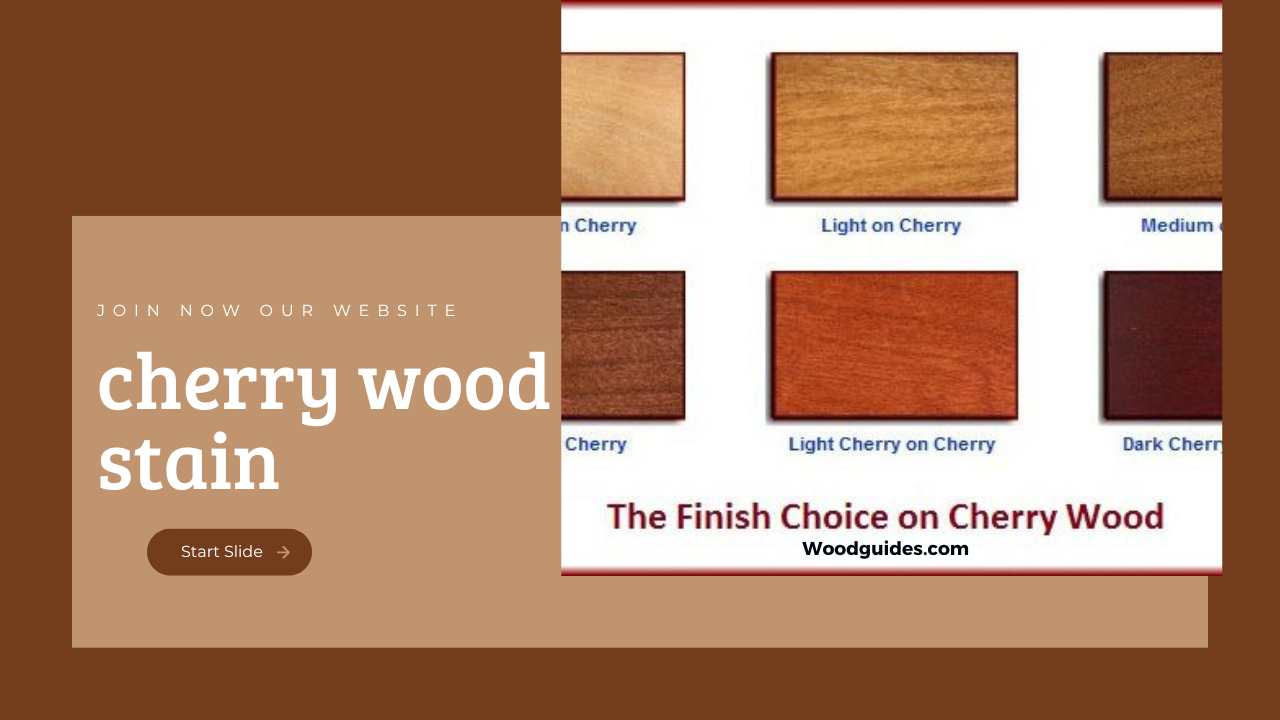
Public favorite cherry wood stain colors and what they do to the wood
Cherry wood stain come in different colors ,each having a specific effect on the appearance of the surface. Let’s see now what some common stain colors do:
Natural or Clear Stain: A natural or clear stain allows one to see through its original color and streaks without any problem. It is a good option for preserving the slight pinkiness hue of cherry wood while giving it an additional coat.
Golden Oak: Golden Oak dye enhances warmth in cherries bringing out rich dark golden brown shades. This adds depth and interest to the natural beauty of woods.
Dark Walnut dye gives off a deeper shade of brown. It makes cherry wood richer and creates an elegant look. It is perfect for traditional or formal spaces.
Red Mahogany: Red mahogany dye brings out red undertones in cherries so that this finish looks intense and lustrous. It will make timber brighter as well as thicker.
Ebony: Ebony dye creates sharp contrast with light colored cherry woods. The blackened surfaces emphasize grain patterns thus imparting impressive touch.
The final look may differ. This is due to factors like original color, number of coverings, and type of coloring agent. But keep this in mind. However, before applying it on the whole surface, always try your stain on a small hidden part.
Step-by-step guide on how to stain a cherry wood
The process of staining a cherry involves thorough preparation combined with great attention to detail as the job is being done. Follow this step-by-step guide for optimal results:
- Prepare the wood surface: To begin with, sand your cherry wood in order to get rid of any blemishes and create a smooth surface. Sand along the grain with fine grit sandpaper. Clean off any dust or debris using a soft cloth.
- Apply the stain: Make sure you stir up your stain well enough so that color is evenly distributed throughout it. Apply some with a brush or cloth or both on thin even layer along direction of grain on wood. Let stain soak into wood according to time specified by manufacturer.
- Wipe off excess stain: After recommended time, take away all excessive staining from your object with clean fabric . As this prevents stickiness and unevenness, always follow proper technique when wiping out.
- Optional: Apply additional coats: Depending on how deep you want your color, you may or may not use additional coats. Wait until each layer is dry before proceeding to apply further coatings. Remember also to wipe between coats.
- Seal the wood: Once the final dye coat dries, add a clear sealant or topcoat. It protects the wood and adds an extra durable coat. This extends the life of the stain. Observe proper application and drying time as per the manufacturer’s instructions.
By following these steps and taking your time during the staining process, you will achieve a beautiful finish that looks professional on your cherry wood Cherry Wood Stain project.
Advantages of Cherry Wood Stain
There are various advantages of using cherry wood stain for aesthetic appeal and longevity.
Enhancing Natural Wood Grain: This is its main advantage since it can reveal more depth and intricacy in patterns contained in woods. It is true especially for cherry trees whose dark reddish brown can be enhanced through correct utilization of stains.
Adding Depth and Richness to the Wood: Richness that comes cherry wood stain adds character to it which cannot be achieved on natural timber only.
Protection Against Wear and Tear: The stain acts like a protective shield against elements as well as general usage. It helps prevent drying out, warping, or developing surface cracks over time.
Tips for achieving the desired finish with cherry wood stain
To ensure the desired finish with cherry wood stain, consider these tips:
- Test the stain on a small area: Before applying it all over, try it first on a small patch that is undercover. This way, you will know how good its color is before committing yourself fully to it.
- Use a pre-stain conditioner: Sometimes, when you use this particular type of wood for staining, it does not absorb evenly, so some parts become blotched or streaky-looking after the staining process. Therefore apply first pre-stain conditioner before using any coloring agent to such surfaces. It would make better penetration by uniformizing the absorption.
- Apply multiple thin coats: Do not put thick coats of one substance onto wooden stuff but deposit several thinner ones instead. Thin coats are absorbed through timber more effectively than thicker ones, thus improving uniformity of color. After each coat, wipe off extra material.
- Protect your workspace: When working with stain, you need to prepare your working space for possible messes. To avoid any accidental spills or stains on surrounding surfaces, cover them with old newspapers or drop clothes.
- Allow for proper drying time: Patience is key when it comes to staining cherry wood. Each coat of stain must be allowed sufficient time to dry prior to adding more coats or sealing the wood. Rushing will lead to incomplete coloring, which is not desirable.
By incorporating these tips into your staining process, you can achieve the desired finish and showcase the natural beauty of cherry wood.
Preserving and maintaining cherry wood with appropriate stain
After you have found the perfect cherry wood stain and completed your project, it’s important to preserve the wood’s beauty. The stains longevity , as well as keeping its look in top shape calls for regular cleaning and proper care.
To clean cherry wood use a soft cloth that does not produce lint or a feather duster in order to take out dust as well as other particles. Use mild chemical agents specifically made for wooden stuff though do not choose highly acidic or alkaline ones since they might spoil even timber oil finishes by damaging their structure rather than cleaning them up (Manufacturer’s instructions).
Protection of cherry wood from excessive sunlight and moisture as well as cleaning is necessary. The stain can be faded by sudden sun rays and make the wood dry out while too much humidity may cause its distortion or change color. To save it from spills, you can use coasters or placemats and protect the wood from sunlight by using curtains or blinds.
Moreover, periodic application of new sealant or topcoat can help keep the wood free of scratches as well as maintaining its lustrous finish. Follow reapplication instructions by the manufacturer and ensure that wood is clean and dry prior!
By following these maintenance practices and choosing the right stain, you can enjoy the beauty of cherry wood for years into the future.
What not to do when staining cherry wood
Staining cherry wood calls for accuracy and attention to detail. This will enable you to avoid common mistakes in order to achieve a perfect finish. Some pitfalls include:
Skip sanding: Sanding is important in obtaining even surface for staining on cherry woods. In absence of this step one ends up with unevenness or blotches.
Over-application of stain: Over-applying too much stain without wiping off excess results into a sticky, irregular finish Sometimes one’s desire for an intense shade could mislead him/her into applying more than needed.
Failure to test: Negligence towards testing the stain on a small part before rolling it out all over culminates into unexpected variations in color or undesired finish- work Always test your chosen product on a non-invasive surface before proceeding with full application Just like marrying someone without dating him/her does not make sense; applying paint without trial may turn out unappealing in most cases.
Inadequate drying time: It is vital that one should be patient whenever he/she intends to apply paint on any type of timber especially if it involves staining cherries.
Inadequate drying times are attributed to such things as inconsistency in dyes and smeared spots. Every coat must be given enough time to dry fully before one can apply another layer of paint.
Failure to protect the working area: Staining can be messy, and by failing to protect your work area, you are likely going to have some spills or stains on the other surfaces usually made of wood in the vicinity. Always remember that we should put down the drop cloths or old newspapers when you are about to start staining.
When these pitfalls are avoided, it will help achieve a professional and beautiful finish on your cherry wood project without any rush.
Frequently Asked Questions
Can I stain cherry wood a different color?
Yes, one may modify his/her piece’s color by applying certain shades of dyes over it. The latter may darken up or even redefine its natural hue in order for you to get what want at last.
What is the best way to use cherry wood stain?
The appropriate application mode for cherry woods’ dye includes using either a brush or rubbing with a clean fabric Stick thin and evenly spread layers following grain line as well as wiping excesses off them.
Does the cherry wood stain take a long to dry?
How long it takes for a cherry wood sealer to dry depends on several factors such as type of paint used and surrounding weather according our place. Get appropriate drying times from manufacturers’ guide books.
Can I mix two different colors of stain together for my own custom shade?
Absolutely, these can be mixed because a combination of two distinct paints makes one get a color that is hard to find even on the market. However, before using it fully, test this blend on an unnoticeable sample surface.
How often should sealant or topcoat be reapplied to Cherry Wood Stain?
To ensure its shine and protection for many years, after some time, it is recommended.
Conclusion
The choice of the right dye plays a huge role in enhancing the natural beauty of cherry. In picking stains, consider the current wood color, desired degree of translucence/opacity and lighting conditions. There are several options of dyes available today that enable customization.
Deepening tones and grain patterns in cherry through stepwise application processes supported by useful tips results in a great finish. Proper care will maintain stained durability while preserving its inherent splendor over decades.
Now that you have all you need to know about the best cherry wood stain to choose from, get started with your own cherry wood project. Emphasize elegance and timeless appeal when unveiling the charm in this kind of timber so as to bring out your real identity.